KERO’S DRAWING CLUB
Let’s draw Kero!
Grab some paper or make a little mess right here.
Draw along, one step at a time.
A pencil, an eraser and your favourite colours.
Red lines show what to add.
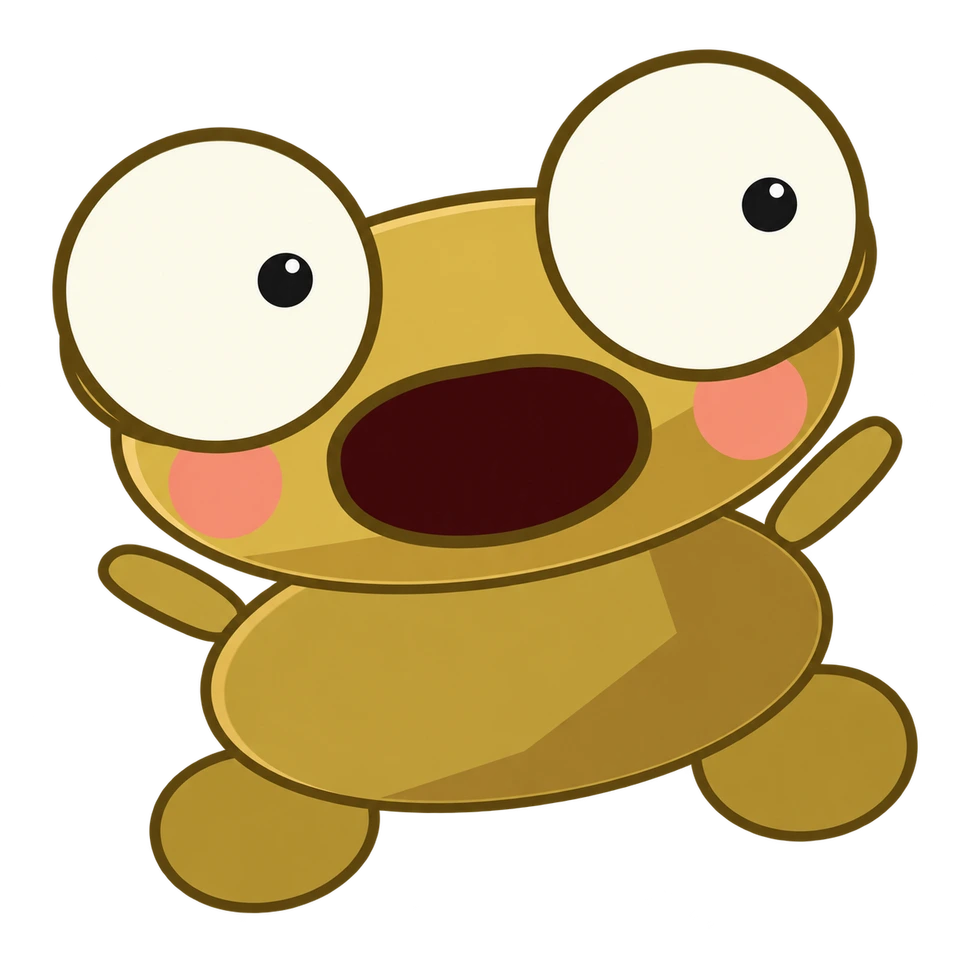 Meet your
drawing buddy.
STEP 1 OF 6
Start with a wide oval
Draw a big, sideways oval for Kero’s head. Leave plenty of space above for his eyes and below for his body.
Keep your pencil light. You can tidy the lines later.
STEP 2 OF 6
Make those eyes HUGE
Add two big circles over the top corners of the oval. Rub out the head line inside each eye.
His eyes stick up above his head. That’s very Kero!
STEP 3 OF 6
Give him a big reaction
Add a small pupil inside each eye, with a tiny white shine. Draw an open oval mouth and two round cheeks.
Big eyes, little pupils, loud mouth.
STEP 4 OF 6
Add a little round body
Draw a smaller, flatter oval underneath the head. Hide its top edge behind the face.
Keep the head wider than the body.
STEP 5 OF 6
Short arms. Squishy feet.
Add two short, raised arms and two round feet. Rub out any lines where the body overlaps them.
Two little arms and two feet. No fingers needed.
STEP 6 OF 6
Bring on the gold!
Trace the outline in dark brown. Colour Kero gold, give him peach cheeks and leave his eyes creamy white.
Your lines don’t have to be perfect. That’s your Kero.
All six steps together
1. Start with a wide oval
Draw a big, sideways oval for Kero’s head. Leave plenty of space above for his eyes and below for his body.
2. Make those eyes HUGE
Add two big circles over the top corners of the oval. Rub out the head line inside each eye.
3. Give him a big reaction
Add a small pupil inside each eye, with a tiny white shine. Draw an open oval mouth and two round cheeks.
4. Add a little round body
Draw a smaller, flatter oval underneath the head. Hide its top edge behind the face.
5. Short arms. Squishy feet.
Add two short, raised arms and two round feet. Rub out any lines where the body overlaps them.
6. Bring on the gold!
Trace the outline in dark brown. Colour Kero gold, give him peach cheeks and leave his eyes creamy white.
Red lines show what to add.
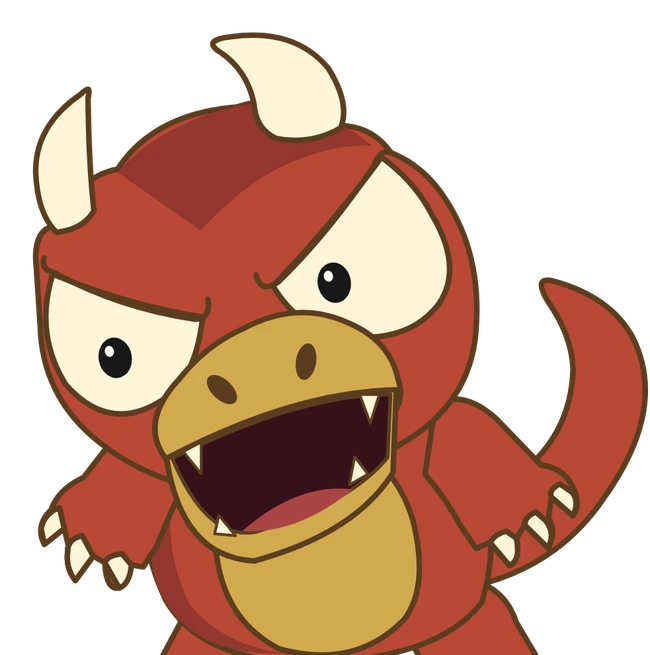 Meet your
drawing buddy.
STEP 1 OF 6
Start with a round head
Sketch a big, rounded head near the top of your page. Keep a little extra room above it for the horns.
Use light pencil lines while you find the shape.
STEP 2 OF 6
Horns and a proper scowl
Add two curved horns. Draw two eyes with sloping top edges, then small dark pupils and a tiny shine.
The eyebrows tilt down towards the middle.
STEP 3 OF 6
A snout and little fangs
Draw a wide, rounded snout over the lower face. Add two nostrils, a curved mouth and two pointed fangs.
Keep those little fangs inside the outline of his chin.
STEP 4 OF 6
A round belly and sturdy feet
Add a rounded body under the head, then a long oval belly patch. Draw two feet with small, pointed claws.
His big head overlaps the top of his body.
STEP 5 OF 6
Claws and a curling tail
Draw an arm on each side with three little claws. Curve a thick tail up behind his body, tapering to a point.
Rub out the tail lines that would be hidden behind him.
STEP 6 OF 6
Red means trouble!
Colour Goro red with a golden snout and belly. Keep his horns, fangs and claws cream. Finish with a dark outline.
A small dragon with a very big attitude.
All six steps together
1. Start with a round head
Sketch a big, rounded head near the top of your page. Keep a little extra room above it for the horns.
2. Horns and a proper scowl
Add two curved horns. Draw two eyes with sloping top edges, then small dark pupils and a tiny shine.
3. A snout and little fangs
Draw a wide, rounded snout over the lower face. Add two nostrils, a curved mouth and two pointed fangs.
4. A round belly and sturdy feet
Add a rounded body under the head, then a long oval belly patch. Draw two feet with small, pointed claws.
5. Claws and a curling tail
Draw an arm on each side with three little claws. Curve a thick tail up behind his body, tapering to a point.
6. Red means trouble!
Colour Goro red with a golden snout and belly. Keep his horns, fangs and claws cream. Finish with a dark outline.
Red lines show what to add.
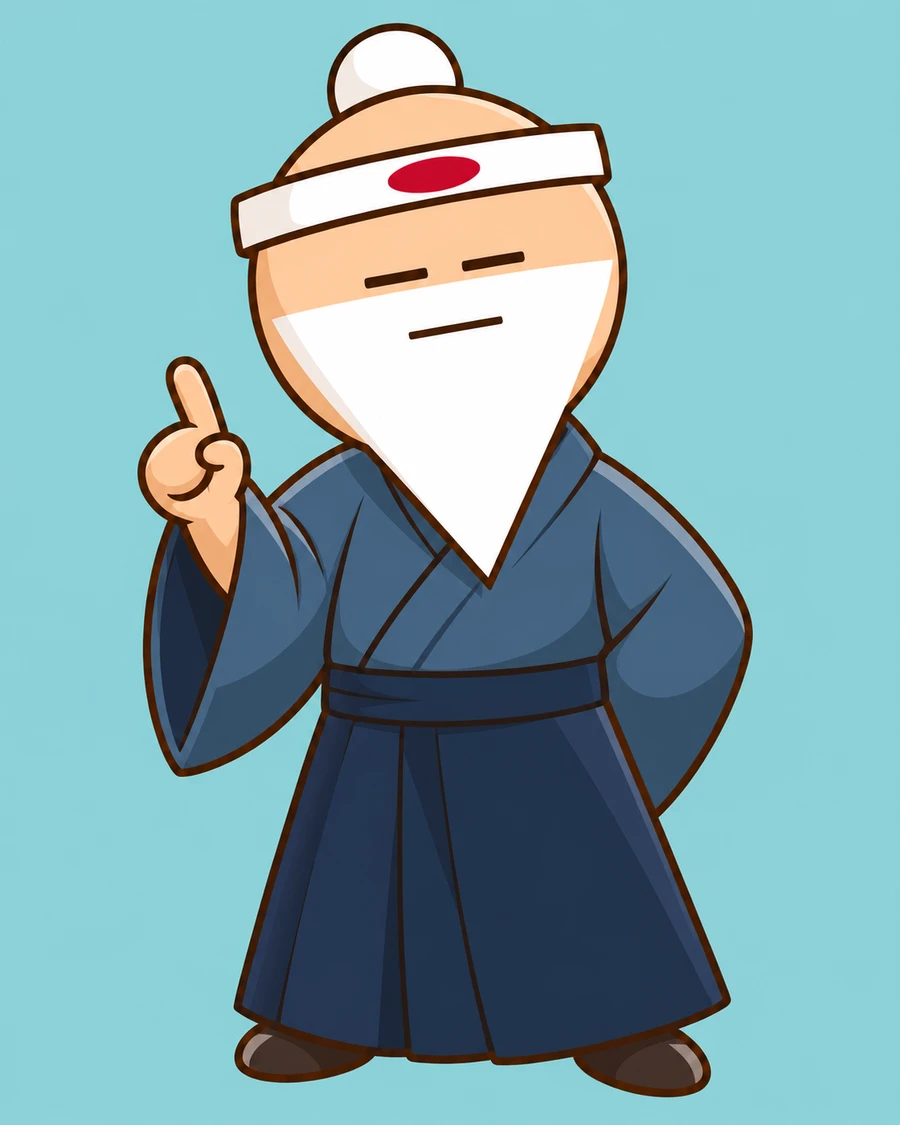 Meet your
drawing buddy.
STEP 1 OF 6
A calm, round face
Start with a tall oval near the top of your page. Leave room underneath for Sensei’s beard and long robe.
Light pencil first. The beard will cover the lower face.
STEP 2 OF 6
Topknot and headband
Add a small round topknot above the head. Draw a band across the forehead with a red circle in the middle.
The headband wraps from one side of the head to the other.
STEP 3 OF 6
That very patient expression
Draw two short lines for his calm eyes. Add a long, pointed beard and one small line for his mouth.
Make the beard wide at the top and narrow at the bottom.
STEP 4 OF 6
Wrap him in a robe
Draw a long robe that widens towards the floor. Add crossing collar lines, a wide belt and a few folds below it.
Let the top of the robe disappear behind the beard.
STEP 5 OF 6
One lesson, coming up
Add a sleeve on each side and two little shoes. Draw a rounded hand with one raised finger. His other hand stays behind his back.
Keep the hand simple. One finger is enough for this lesson.
STEP 6 OF 6
Blue robe. White beard.
Use blue for the robe, darker blue for the belt and peach for the face and hand. Leave the beard and headband white.
Tiny red circle, big teacher energy.
All six steps together
1. A calm, round face
Start with a tall oval near the top of your page. Leave room underneath for Sensei’s beard and long robe.
2. Topknot and headband
Add a small round topknot above the head. Draw a band across the forehead with a red circle in the middle.
3. That very patient expression
Draw two short lines for his calm eyes. Add a long, pointed beard and one small line for his mouth.
4. Wrap him in a robe
Draw a long robe that widens towards the floor. Add crossing collar lines, a wide belt and a few folds below it.
5. One lesson, coming up
Add a sleeve on each side and two little shoes. Draw a rounded hand with one raised finger. His other hand stays behind his back.
6. Blue robe. White beard.
Use blue for the robe, darker blue for the belt and peach for the face and hand. Leave the beard and headband white.
Your very own drawing pad.
Draw with your mouse, finger or pen. Trace your character, add shapes or colour an outline.
Each character has their own drawing. Switch back to keep going, and save a PNG before leaving.
Pick a colour and draw over the faint lines.
A wonky line? A different colour? That’s what makes it yours.